I decided to make sewing kits as Christmas presents this past year. I wanted to reuse Altoids tins I had for a small travel case.
SUPPLIES Exterior
- Cotton fabric
- Felt fabric
- Steam-to-Steam
- 3/8 inch ribbon
- Scissors
- Glue
- Iron and ironing board
- Altoids tin
DIRECTIONS
— 1 —
Cut a piece of felt that is the dimensions of the Altoids tin’s top. This should be about 3.75 inch length by 2.375 inch width. Round the corners to match.
— 2 —
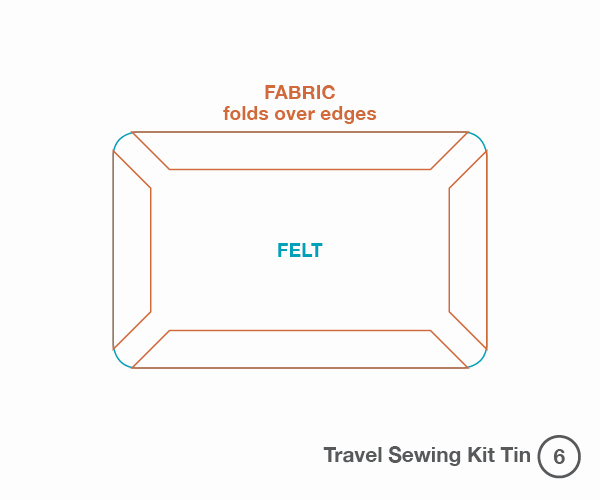
Cut a piece of fabric that’s about an inch longer in length and width to the Altoids tin’s top—about 4.75 inch by 3.375 inch.
— 3 —
Cut a piece of Steam-to-Steam that is about 0.25 inch longer in length and width to the Altoids tins top—about 4 inch by 2.625 inch.
— 4 —
Using the directions of the Steam-to-Steam, adhere the felt piece to the wrong side of the fabric.
— 5 —
Cut the corners of the fabric.
— 6 —
Add glue to the fabric. Carefully fold over each fabric side to the felt. Add extra glue if necessary. Press gently. Let dry.
— 7 —
Add glue to top of Altoids tin. Adhere the fabric felt piece on top. Let dry.
— 8 —
Add glue around the outside of the tin lid.
— 9 —
Carefully place ribbon along the side of the tin lid (to cover where the fabric felt piece and the tin meet). Cut the ribbon when the ribbon overlaps. Add a little bit of glue to the overlapping ribbon. Let dry. Travel Sewing Tin complete.
To fill the tin with sewing supplies, I bought sewing supplies and divided them among the number of kits I was creating. This is for one kit.
SUPPLIES Interior
- 4 needles (different sizes)
- 4 pins
- 4 buttons (different sizes and colors)
- 2 safety pins (different sizes)
- Travel scissors
- Thread (I used five colors: white, black, red, navy and gray)
- Chipboard (Could use the back of the drawing pad, or food box packaging like cereal)
- Scissors
- Pencil
- Ruler
- Felt fabric
— 1 —
Cut out of piece of chipboard that is 1.75 x 3 inch. On the long side, measure and mark at every 0.5 inch (there should be a total of 5 marks). Repeat on other side.
— 2 —
With scissors, cut little triangles out at each mark. I eyeballed this—they triangles are about 0.125 inch deep.
— 3 —
In the middle of the chipboard short end, cut about .0375 inch deep with scissors. Repeat on the other short end.
— 4 —
Wrap the thread around the chipboard, catching the thread between two triangle notches. I wrapped my thread around the chipboard about thirty times.
— 5 —
Then take the thread and put it through the slit on the short end of the chipboard. Cut thread. Repeat this process for the other thread colors.
Note: On the two bottom threads, I used the bottom slit to put the thread through.
— 6 —
Cut two pieces of felt fabric about 1.75 inch by 2.5 inch.
— 7 —
On the first piece of felt, slide four needles though.
— 8 —
On the second piece of felt, slid four pins through.
— 9 —
Put all components of the sewing kit inside the tin. Travel Sewing Kit complete.


