Showing posts with label crafts. Show all posts

Thursday, March 28, 2019

Vintage Book Box


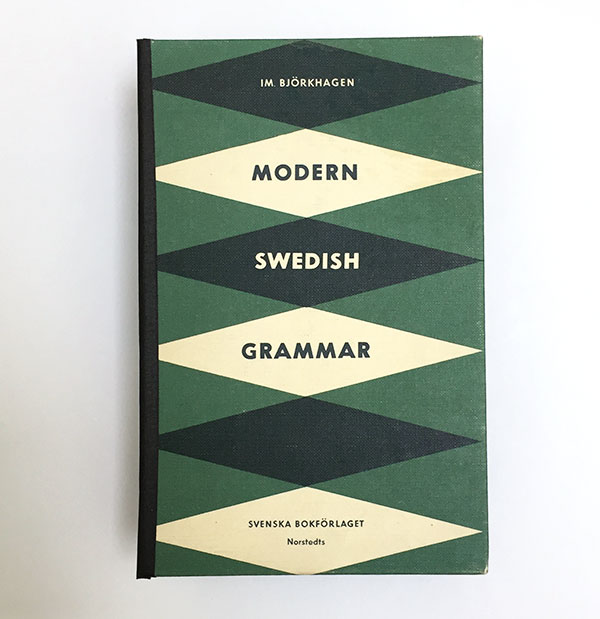
I created boxes from vintage books. I removed the cover from the pages and then cut the spine away. Because the cut edge for the front and back cover pieces looked ragged, I used some black masking tape to cover it up.


I used black foam mat for the box sides. I cut the four sides to the sizes I wanted, and used bookbinding glue to glue sides to the cover and glue the corners together. Once it dried, I used black masking tape to cover the corner edges.


To keep things simple, the box lid is a piece that is placed on top of the box. I cut a piece of black foam board and glued it to the back side of the front book cover piece so the lid wouldn’t slide off the top. The box isn’t the sturdiest of boxes, but it turned out pretty cute. I used the book boxes as packaging for gifts.

This is the second book box I made.


Thursday, February 14, 2019

Cross Stitched Pendants


This past Christmas, I made cross stitch pendants as gifts. I thought they could be used for necklaces, keychains or Christmas ornaments. I designed two patterns and used each pattern twice, using different color schemes.


Since the pendant was one inch in diameter, I wanted to have a finer stitch so there could be more detail in the design. I decided to use aida cloth that had about 26 stitches per inch (rather than the 14 stiches per inch that I’ve used in the past). The result: it took a lot longer to finish than I anticipated. But overall, it turned out fairly well.


Putting the finished cross stitch into the pendant also took some doing. I messed up the first time (which sucked). In the end, I cut out a chipboard circle that had a 0.875-inch diameter. I cut the cross stitch piece to a square (wider than one inch) and then trimmed the corners.

I placed the chipboard circle in the middle of the cross stitch piece and added book binding glue to the back of the chipboard circle and pressed the cloth edges around it. I applied glue to the pendant. Then I pressed the circle piece onto the pendant to adhere it to the glue. I tried my best to make sure the design was centered. It took some doing to get all the edges down within the pendent circle area; fingernails and tweezers helped to get the edges smoother.

I found cross stitching the designs to be fun and relaxing, but gluing the finished design was a bit stressful because if you mess up, you have to start all over (which happened).


Thursday, November 29, 2018

Skirt Bag


Years ago, I had some wool skirts that didn’t fit me too well, but I liked the fabric so I ripped them up thinking that I would use the fabric someday. That day finally came. I decided I needed a new tote bag since my old one was raggedy and gross, and thought this was a good opportunity to use up that wool fabric.


I had three fabrics from wool skirts to use, a black, a dark gray and a red. I ironed them and measured them to see how much fabric was available to me and sketched out a design for the bag.


I realized that I didn’t have quite enough fabric from my repurposed skirts. So I decided to use some vintage wool fabric my grandmother gave me. The checkered red, gray and cream fabric matched well with my color palette. The one problem was that the fabric had quite a few moth holes, so I had to position my cut outs just right. I barely had enough fabric.

After I had sewn the fabric panels together, I saw that one of the black fabric blocks had a moth hole smack dab in the middle. This was unfortunate as I had already cut the fabric and didn’t have enough to replace the damaged piece. So first I used some thread to sew over the hole, hoping to patch it enough that it wouldn’t expand. Sadly, this looked like a pimple breaking out on a forehead. I didn’t like the way it looked and wanted to cover it up.

So I decided to put a pocket on top of it. Ideally, I wouldn’t have to do this because I wanted the bag to be simple. And quite frankly, I dislike useless pockets. And I’m never using this pocket…for anything. However, it fulfilled its purpose of covering my moth hole. [Sigh.]

The red fabric in the handle wasn’t initially part of my design. However, the black strips of fabric for the handle seemed short to me, and as I didn’t have any more black fabric, I could only use what I had left, which was the red.

When I pinned the straps to the bag, the thickness of the fabric concerned me. I didn’t think my sewing machine would handle it well, so I decided to hand sew it. Unfortunately, my hand sewing skills aren’t very pretty. I used embroidery floss to help cover my poor stitching.

The bag is reversible. At first, I thought I wanted the black and gray side to be on the outside of the bag, but I soon realized that I preferred the red side more. The bag is a bit larger than I anticipated, but it fits everything I need.


Thursday, October 18, 2018

Needlepoint Book


I bought this book from the 1970s for $1. I haven’t ever done needlepoint, but I liked the patterns in it.


I like some of those geometric patterned pillows.

Here are some of the patterns in the book.


Thursday, June 28, 2018

Altered: Navy Pants


I bought these old lady pants at a thrift shop thinking I might be able to alter them. And I did. I cut about four inches off of each pant leg, and then sewed elastic at the bottom of each leg. It was simple and I finished it in a couple of hours.

Truthfully, I’m not sure if I will wear these pants out in the world; they might just be pants I wear at home. They’re pretty comfortable as they have an elastic waistband. And I like that it has pockets.


Thursday, April 19, 2018

Cross Stitching Fun


When a couple of friends and I were planning to get together, one friend suggested taking a class—like cross stitching. She sent a link to the class, and my other friend’s response was, “$60! For $60 each, we could get all the supplies and make our own class.” And that’s what we ended up doing.

One friend got some Aida fabric and embroidery floss from a thrift store. And when we met up, we went to a craft store to get extra supplies (just some hoops and needles). The grand total for everything was about $7 a piece.

I picked up a couple of cross stitching books from the library, and we followed their straightforward directions. And after a couple of early mistakes, we all got into the rhythm of cross stitching. It has to be one of the simplest crafts to do. I knew nothing, and after about 10 minutes, I was stitching right along.

My friends picked a couple of images online to replicate. I just picked these classic video game characters from one of the cross stitching books I had. Truthfully, I didn’t really care too much about what I was making, I just wanted to learn how to cross stitch doing something fairly easy. I followed the pattern to a point; I did alter some of the characters so they would align more vertically and horizontally.

It did take a good amount of time to finish, but I finished it over the course of a week. I liked cross stitching—it was very relaxing. The only downside is I’m not sure what to do with the finished cross stitch…I’ll have to think about it. But I think this might be a craft that sticks. It was pretty fun and creative and very low stress.


Thursday, March 8, 2018

Navy Dress


I've sewn a raspberry version of this dress some years ago. I remember it being fairly simple to make, so I thought I'd make it again. My new navy version of this dress turned out…okay. I admit, I didn't go back and try to recall what I did on the raspberry version of the dress, and I pretty much made the same mistakes as I did before. [Sigh.]

The first error is that the skirt and bodice seams don't align properly in the back—it's about a quarter of an inch off when I zip it up. Which is why it's good to wear a belt or sash over my mistake.

The second error is that dress was too loose in the bodice. So after the dress was sewn, I just sewed the sides in. I know it's super sloppy, but I didn't want to undo everything because I'm lazy. So the dress fits a bit better than it did before, and I can and will wear it, but the craftsmanship on this dress isn't particularly good.


Thursday, January 18, 2018

Vanilla for Christmas


This year I made vanilla for Christmas gifts. Since vanilla is super easy to make (just putting vanilla bean and vodka in a bottle), the packaging took the most time (and truthfully, I didn’t spend that much time doing it either). I kept it pretty simple. I just made a tag that said the ingredients and when it was bottled. And a label that said what it was—vanilla. I have yet to try it…so I hope it tastes okay.


Friday, December 22, 2017

Yarn Tassel Wrapping Decoration


Instead of using a bow, I used yarn to create tassels to wrap around a gift. I just looked up how to make a tassel online and followed the directions.

The main change I made was the yarn that is tied at the top of the tassel is quite long in order to wrap around the gift.


I also made two of these tassels. I wrapped these yarn tassels around the gift and then tied the ends together (and then tied the excess yarn in the back and cut any excess yarn).

I thought it was pretty cute and warm looking. And it’s a good way to use up leftover yarn.


Thursday, July 20, 2017

Bright Geometric Pullover Dress


I’ve made this pullover dress before—it was an easy dress to make and had wanted to make another one for quite some time. I finally got around to it. Since the pattern is so simple, I thought a more interesting fabric would be nice to use. For the bodice, I decided on using a bright geometric fabric that I got at a thrift store. For me, a little pattern goes a long way, so I picked a plain black crepe fabric I had in my fabric stash for the skirt portion to balance things out.

I didn’t run into any problems sewing the dress. But I’ll admit that I was too lazy to fix the seams where the pattern doesn’t meet itself properly. It was my intention to do it right, but I wasn’t paying too much attention when I was pinning the fabric together and sewing it. I realized my mistake after the fact, and truthfully didn’t care that much. I mean, how often are people looking at your side seams?

The one improvement I made was that I added pockets this time. The pattern doesn’t have pockets, so I took a pocket pattern piece from another dress and just added it in. It didn’t take too much extra time to do and was totally worth it.

Overall, I’m satisfied with the dress. I like the pop of color and interest the pattern brings—which is pretty vibrant in comparison to most of the clothes I wear. I also like the dress when I use a sash that I made some time ago (and is the same black crepe fabric as the skirt).


Sunday, June 25, 2017

Bed Sheet Culottes


I had to alter my culottes pattern, so I wanted a fabric that I could use as a muslin to test my alterations. Culottes require quite a bit of fabric, so I bought a bed sheet from a thrift store (and thus had an ample amount of fabric to work with).


I didn’t run into any issues sewing this pattern; it was pretty simple. It uses buttons for closures, rather than a zipper. And it has pockets—which is awesome. The culottes took me a bit of time to finish them (as I slowed slowly here and there during the weekends). And overall, I’m satisfied with the results. I’d like to try this pattern again with a heavier fabric, and perhaps one of the different versions of it.


Sunday, December 18, 2016

Sleeveless Gray Dress


I decided to make another dress using the pattern I’d used to create my red dress. Looking over my fabric stash, I chose a gray fabric that had about 4 yards. Because I had so much fabric, I decided to use the longer version of the dress pattern.

Since I’d already sewn this pattern before, I didn’t run into any issues. It was quick and easy. However, in retrospect, I probably should have used this fabric for a different dress. It’s a slightly heavier fabric, so I think I should have made a dress with sleeves instead. [Pause.] Oh well.

Sunday, August 28, 2016

Simple Red Dress


I wanted to sew something easy, so I picked this dress pattern. I decided on creating the shorter version of the pattern, but it still required a good amount of fabric. Looking over my fabric stash, I chose a red textured fabric that I had bought a long time ago. It wasn’t a fabric I loved, so I thought it would be a good test for sewing this pattern for the first time.

I tried to alter the pattern beforehand because I thought my measurements didn’t quite coincide with the envelope sizing. However, I tend to like my garments to have less ease than the envelope sizing, so in the end, I had to undo that pattern alteration because the garment was looser than I wanted. So that added some unnecessary time to my sewing.


Other than that, sewing this dress was fairly quick as there weren’t any complicated sewing steps. In the end, I quite liked my dress. I wanted a red dress (but I never seem to find one I like when I’m thrift shopping), so it was nice to make something that I wanted. I like the simple cut of this dress—which makes it quite versatile.

Thursday, August 18, 2016

Revamped: White House Black Market Dress to Skirt


Shortly after I bought this White House Black Market summer dress at a thrift store for $3.50, I altered it. It was my initial plan from the beginning (as I do not like wearing strapless dresses). I wanted to do it sooner rather than later for two reasons: it’s summer now so I could wear it, and if I lost momentum and set it aside—I might never get around to doing it.

First, I marked on the dress where I wanted to cut it. Then I took out the zipper. The dress was well made so it took a bit more effort to take it apart.

I cut the skirt portion off. At first I thought I’d use the zipper that had been part of the dress as the zipper in my skirt. However, it was an invisible zipper, and I thought that a normal zipper would be easier to put in the skirt (as it already had a seam). Lacking a regular white zipper, I used a black zipper. I sewed the zipper to the skirt. It had a lining that I attached to the top of the skirt and around the zipper.

Ideally, I wanted a white waistband. However, I didn’t have any white fabric that matched exactly. And it would have really bothered me to have the pure-white skirt fabric next to an off-white waistband. So, I decided to use some black fabric I had instead. I cut out and sewed the waistband to the skirt. Then added eyes and hooks to the waistband and I was done.


This took me about 8 hours to do as I am not a speedy sewer. Overall, I’m happy with the skirt and think it turned out well.

Sunday, June 12, 2016

Revamped: Dress to Skirt

I got this dress a while back from a thrift store. The dress was a bit large on me, so I thought the easiest thing to do was to alter it into a skirt.

I cut the dress under its elastic waistband, and cut off a section of fabric to create the waistband. I undid part of the side seam and put in a zipper. This was done not as cleanly as I would have liked. The seam allowance was only at about a quarter inch, so I didn’t sew through all the fabric when I put in the zipper. So I hand sewed the fabric that didn’t catch, which made it rather sloppy. But I was just too lazy to redo it. I gathered the top of the skirt and then sewed the waistband to it.


Overall, it didn’t take as long as starting from scratch, but isn’t something I feel super excited about. It’s a fine skirt, wearable, but not something I love.

Thursday, March 17, 2016

Super-Wide Leg Star Pajama Pants


Recently, I sewed another pair of super-wide leg pajama pants. I love the first pair I sewed, but noticed it was looking a little worn, so I decided to sew a second pair. This time I used this light blue with white star pattern fabric (that I got an estate sale).

I’m very satisfied with my pajama pants. They’re very comfortable, light and airy—perfect for when the weather becomes warmer. And as always, I love anything with pockets.

Thursday, February 18, 2016

Potholders for Christmas


I decided to make potholders as Christmas gifts this year. I’d never made potholders before, but looking online, the directions didn’t seem too difficult. I thought they would be useful items to have, and I also thought they wouldn’t be too difficult or time-consuming to make.

First, I bought a yard of red cotton fabric and made bias tape…that took some time. I decided I wanted to make potholders with a pocket, partly because I think it adds visual interest and partly because I like the added functionality of it. I cut out squares in my chosen fabrics, batting and Insul-Bright. I quilted each fabric piece to batting or Insul-Bright. I added the pocket (that was bias tape edged at the top) to one fabric piece, and then basted all layers together to stay in place. I trimmed the sides. Then I sewed the bias tape along the edges.

In the past, I’ve used bias tape minimally and probably not very well. I looked at my sewing book for directions of how to sew bias tape around corners and tried to follow its directions. I had varying degrees of success. I think it got easier over time, but it still looks rather messy. I also had issues because I wanted a loop for hanging. I did it pretty horrendously the first time and had to redo it. I don’t think my solution looks super awesome (although it’s better than it was), but hopefully it’s functional.


I created four sets of potholders that were all made with 100% cotton. Three of them used navy (scrap fabric from a skirt) as a neutral and the red bias tape for a pop of color. The first set I used blue patterned fabric that was scrap material from a dress I made some time ago.


The next set used a blue geometric pattern that was also scrap fabric from when I made some bags.


The third set used My Little Pony fabric.

The fourth set (top photo) I used a yellow bias tape (that I made). I wanted to use this fun spoon pattern as the main fabric and chose a light gray as an accent color. This is my favorite set that I made (and it was created last, so I think it’s made a bit better).

Discounting the amount of time it took to create my own bias tape, I would say it probably took me about 4-5 hours to create one set of potholders. Some of this was because of trial and error and learning to create something different. I struggled using the bias tape more than I thought would have and was never very happy with it. I also think I’m just on the slower end of the sewing spectrum. Luckily, I managed to finish them all before Christmas.


Thursday, December 24, 2015

Black Velvet Dress Altered to a Skirt


I got this very large black velvet dress from a thrift store for $5. Seeing the amount of fabric, I thought I could turn this dress into a skirt to wear to a holiday party. My plan was to do as little as possible because I didn’t want to spend a long time working on it (as I wasn’t going to be wearing it often). So I wanted to avoid putting in a zipper or hemming it.

First, I cut the dress at the waistline. I used some bottom weight fabric to finish the cut edge because I thought turning over the velvet fabric would create too much bulk. My initial thought was to put in an elastic waistband, but I quickly realized that the fabric was just too thick and would bunch unattractively.

So, instead, I decided to wrap the extra fabric in the front using two sets of eyes and hooks. This took longer than I anticipated, and I ended up moving the eyes and hooks a few times so the placement would fit my waist better.


I also sewed a sash using black bottom weight fabric; I thought it would help cover the skirt’s thickness, and act as a belt to help keep the skirt in place (and I thought it looked cute).

Monday, November 2, 2015

Simple Purple Blouse


A while back I got this vintage blouse pattern that looked simple to make. Since this blouse has seams down the front and back (and therefore didn’t require a wide piece of fabric), I thought a narrow piece of purple fabric that I bought at a thrift store would work perfectly.

After measuring the pattern, I thought it would fit me as-is and thus left it unaltered. I sewed it sporadically over a couple of weekends and didn’t run into any problems.


My favorite part of this blouse is the color. However, the fit of the blouse isn’t quite what I would like. I find it a bit loose in the bodice (I didn’t put the darts in because I thought it would be too tight…maybe that was a mistake). But the biggest issue I have is that the sleeves feel tight. Looking at the pattern drawing, the sleeves do seem to be more form fitting, but I don’t like it. It feels a bit constraining. So if I use this pattern again, I’ll have to make some changes.

Tuesday, September 8, 2015

1970s Wrap Dress


I finally finished my 1970s wrap dress; it took a while because I sewed sporadically over a few weekends. After measuring the pattern pieces, I altered it (in length and width) and managed to squeeze the pattern pieces onto my barely large enough piece of fabric. Because the position of the pattern pieces on the fabric was straight, I thought this fabric would work well because of the pattern’s vertical orientation.

I decided not to do the keyhole detail and pocket because I didn’t really like it. I also did a quick narrow hem on the dress because I didn’t want the length of the skirt to be any shorter. (I’d already shortened the length of the skirt when I cut it out because I was about 1/8 yard shy of the fabric requirements.)

The dress itself wasn’t difficult to sew. In fact, I didn’t have any trouble with it at all. The biggest hurdle was realizing that I didn’t have any half-inch double-fold bias tape in navy, and instead of buying it, I decided to make-do with the quarter-inch double-fold navy bias tape that I happened to have on hand.


It’s a pretty comfortable and lightweight cotton dress to wear—perfect for summer (although its days are already numbered). I prefer to knot the tie ends in the back rather than a bow in the front. It’s a simple dress and I’m pretty satisfied with it.