

I had a stack of index cards that I was never going to use. Quite frankly, I wasn’t even sure why I had them since I’d never used them while in school (once upon a time ago). To finally use them, I decided to make a pad.

SUPPLIES
- 3x5 index cards (about 25)
- 2 paint samples (that are at least 3x5 inch in size)
- ¼ inch screw posts
- ¼ inch hole punch
- ruler
- x-acto knife
- self-healing cutting mat
- pencil
DIRECTIONS
— 1 —
Turn paint sample (for the cover) over. Using an index card as a size template, trace around it on the paint sample with a pencil. Do the same for the paint sample you want for the back cover.
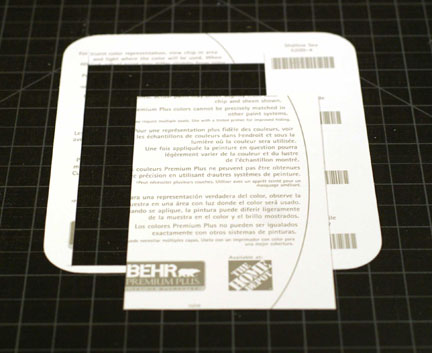
— 2—
Cut out the rectangles from the paint samples.

— 3 —
Mark on the backside of the cover paint sample where you want your hole to be. (I did mine at about 3/8 inch away from the edge.)
— 4 —
Using a hole punch, punch the marked place in the paint sample.

— 5 —
Using that hole as a template, align index cards (a couple at a time) and punch through template hole. Repeat until all index cards are punched through.
— 6—
Punch the hole through the back cover paint sample (make sure the color is facing outwards).

— 7 —
Once each card has a hole, put the screw post through the hole and screw together. Pad complete.
No comments:
Post a Comment
Note: Only a member of this blog may post a comment.